
How To Perform CPR
The International Liaison Committee on Resuscitation is an international organisation that periodically publishes resuscitation guidelines based on good scientific evidence. There are various regional bodies such as the American Heart Association, the European Resuscitation Council and the Australia New Zealand Committee on Resuscitation that then review the science, and publish protocols and flow charts for use by medical professionals and the general public within their jurisdiction.
These recommendations are based on 2020 American Heart Association Guidelines for CPR and ECC. There may be some minor differences in recommendations from those issued by other bodies. At the end of the day, high quality CPR following any of the recommended protocols is infinitely better than no CPR. That said, especially in a duty of care situation, please ensure that you are familiar with the guidelines recommended for your location.
Reading the below is not a substitute for training in CPR.
When you come across any situation requiring first aid, it’s imperative to remember that your first priority is your own safety, your second priority the safety of anyone helping you perform first aid, your third priority is the safety any bystanders and the general public and your fourth priority is the safety of the person requiring first aid, and rendering assistance.
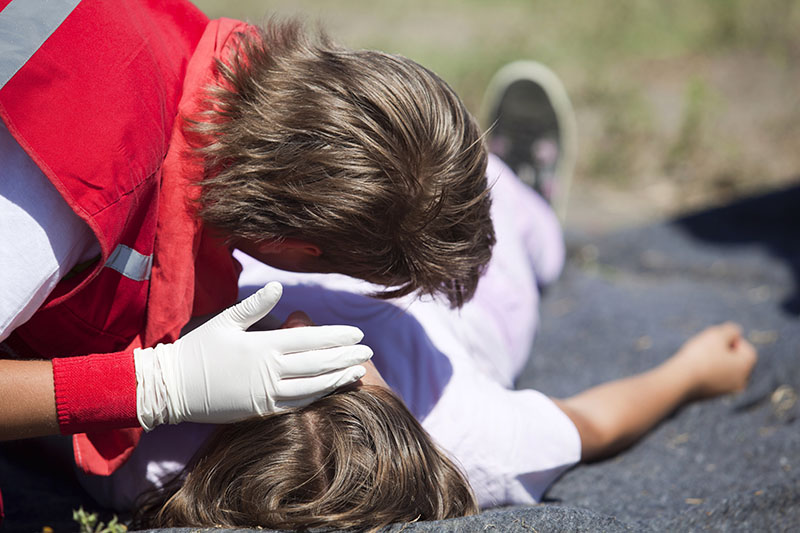
Don’t forget to use your PPE (gloves, face mask, and anything else that may be necessary in the circumstances).
We have a handy mnemonic that we use for our primary assessment: DRSABCD.
D – Danger
Check the situation for any danger, following the order of priorities we just discussed. Where possible, mitigate the danger and proceed. As a rule of thumb, if you can remove the danger from the patient, do so. Remember to use more than just your sight to check for danger. Smell and listen for anything that may represent danger. If you cannot, consider removing the patient from the danger. That said, you should only move a patient if there is a really good reason – for example – you are not able to safely perform CPR in their current location or they are at risk of death or significant further injury in their present location. If you cannot mitigate the danger to an acceptable level, sometimes the best that you can do is call emergency services and wait for the professionals to arrive. There is never a reason to put yourself in danger.

R – Response
Once you have identified and mitigated any identified dangers, seek a response from the patient. This can be done before approaching the patient by calling out to them. If they respond, you can breathe a sigh of relief in the realisation that there is currently no need to perform CPR. If however they do not respond, approach the patient, continuing to check for and manage dangers as you do, and try to elicit a pain response. This can be done by tapping heavily on the patient’s shoulders or rubbing the patient’s sternum with your knuckles. Once again, a response to this is indeed a positive sign.
S – Severe Bleeding, Send for Help, and Spine
Identify any severe bleeding and control it with well aimed direct pressure. Note that we aren’t talking minor lacerations here, we are talking significant bleeds that produce a pulsing spurt as the heart beats. These bleeds may also be a brighter red than the blood you are used to seeing. Use well aimed direct pressure, with your gloved hand or some gauze to control the bleeding. If you have bystanders or someone to help you, ask them to perform this task so that you can continue with your assessment.
If the patient is unresponsive, activate emergency services. Once again, this could be delegated to a bystander, or if you are alone, call with your mobile phone on speaker so that you can continue your assessment.
Consider the patient’s spine. If there is a mechanism of injury that could have caused injury to the spine, protect the patient’s C-Spine with manual inline stabilisation. This is another task that could be delegated to a bystander.
A – Airway
Open the patient’s airway, checking for any foreign bodies, then tilt the head and lift the chin in order to ensure that airway remains open. If there was a mechanism of injury that could have affected the spine, consider a jaw thrust procedure instead if you know how.
B – Breathing
Assess the patient for normal breathing. If they are not breathing or are only gasping with no rise and fall of the chest, commence CPR.
Prior to COVID, in order to check if a patient is breathing, we would place our cheek and ear over the patient’s mouth and nose, and listen and feel for air, whilst watching the chest for rise and fall. If we can’t detect normal breathing within 10 seconds, it’s safe to assume that the patient is not breathing, and we should commence CPR.
In COVID times, for an Adult patient, we recommend placing a towel or other article of clothing over the patient’s mouth and nose to prevent the aerosolisation of respiratory droplets that can transmit COVID, and to watch the patient’s chest for rise and fall from not closer than an arms-length from the patient’s face.
C – CPR
General Recommendations
CPR in its most basic form comes down to two things:
- Call emergency services (999 in Malaysia, or 112 from a mobile phone in most countries)
- Push hard and fast in the centre of the chest.
That said, there is quite a bit more to it than that.
CPR consists of 30 chest compressions, followed by 2 rescue breaths, followed by 30 chest compressions, followed by 2 rescue breaths, and so on and so forth unless one of four specific situations arise.
For your own safety, a barrier device such as a CPR face shield, pocket mask or intraoral mask should be used. If you do not have a barrier device and the patient is not an immediate family member, consider performing hands-only CPR and not performing rescue breathing. Also, if you’ve never been trained in CPR, it is reasonable to perform hands-only CPR and not perform rescue breaths.
To perform chest compressions on an adult, interlock the fingers of your non-dominant hand over those of your dominant hand, and use the heel of the dominant hand to perform the compressions. For a child, depending on their size and yours, one hand may be adequate to create the necessary force. For an infant, use two fingers.
Factors that contribute to high quality compressions include:
- Performing compressions on the correct location (centre of the sternum)
- Performing 100-120 compressions per minute (approximately 2 per second, or in time with the beat of Staying Alive by the Bee Gees
- Compress approximately one-third of the patient’s chest depth
- Allow full chest recoil between each compression
- Get your shoulders up over the patient’s chest so your arms are at 90 degrees, and lock your elbows, using your entire upper body to perform the compressions
- Where possible, change compressors every two minutes to avoid exhaustion
- Limit disruptions to CPR to a maximum of 10 seconds, including when delivering rescue breaths or applying an AED.
Once you’ve performed 30 compressions, move on to rescue breaths. Open the patient’s airway by performing a head-tilt, chin lift and if using a face shield, pinch the patient’s nose shut. Breath into the patient, watching for chest rise and fall. Each breath should be delivered over approximately one second. If you don’t see the chest rise and fall, reposition the patient’s airway, check that you are pinching the patient’s nose shut or applying adequate downwards pressure on the pocket mask, and try again. If you see the stomach rise and fall as well as the chest, you may be blowing too hard or too much.
As soon as the AED arrives, we attach it to the patient, without interrupting compressions.
Adaptation for COVID
Due to the risk of COVID infection, the recommendation is performing hands-only CPR on an adult patient who is not an immediate family member, however if you are willing and able, perform both compressions and rescue breathing for a patient who is a child.
Terminating CPR
Once we start CPR, we stop for one of four reasons only:
- Return of spontaneous circulation (signs of life)
- We are at danger of injury if we continue
- We are so exhausted we cannot safely continue
- Someone of equal or greater training takes over

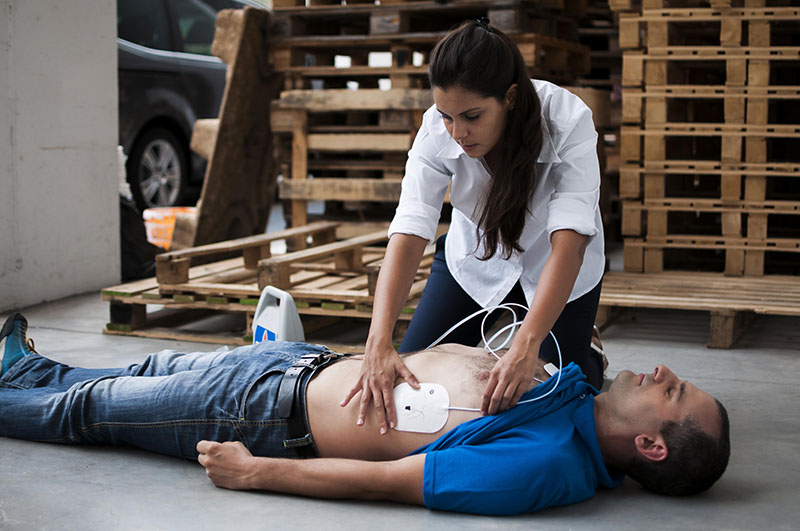
D – Defibrillation
In some types of cardiac arrest, CPR alone is extremely unlikely to provide a positive outcome, and the only proven method to achieve return of spontaneous circulation is the use of an Automated External Defibrillator (AED). AEDs send an electrical current across the heart, stopping it, in the hope that the heart will restart in an organised and more functional rhythm.
AEDs are becoming increasingly available in public spaces such as shopping centres, airports, clubs and other major facilities, but are still relatively uncommon in private settings such as condominiums, apartments or even individual residences. Considering four out of five cardiac arrests occur at home, the reason for this defies logic. Immediate CPR and early defibrillation can more than double the chance of surviving cardiac arrest, and communities with comprehensive AED programmes that include CPR and AED training have achieved survival rates of nearly 40%.[5]
AEDs are designed to be used by untrained laymen, and are incredibly simple and safe to use. Using an AED is as simple as opening the box, turning it on and following the voice prompts. Using an AED does not negate the need for chest compressions. High quality chest compressions remain the mainstay of good CPR. Chest compressions should not be interrupted when applying an AED, in fact the only time compressions should be paused is when the AED announces “Do not touch the patient.”
Fact Checked by Dr Peter Natarajan